17+ Sample Property Inspection Checklist
-
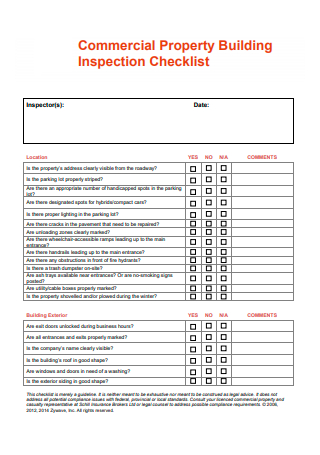
Commercial Property Building Inspection Checklist
download now -
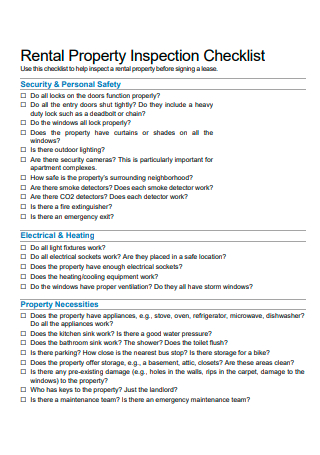
Rental Property Inspection Checklist
download now -
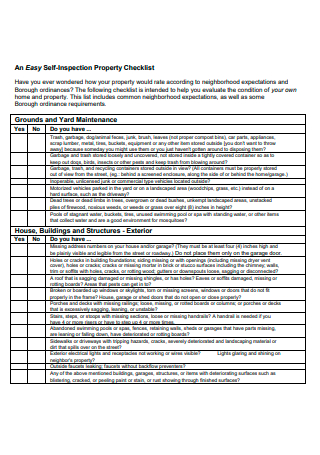
Property Self Inspection Checklist
download now -
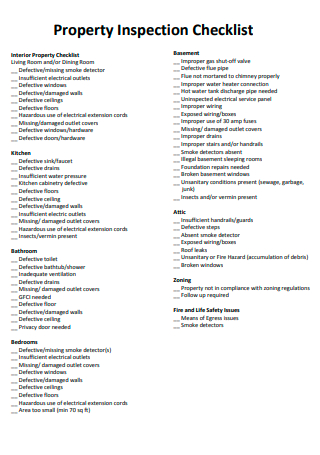
Property Inspection Checklist Example
download now -
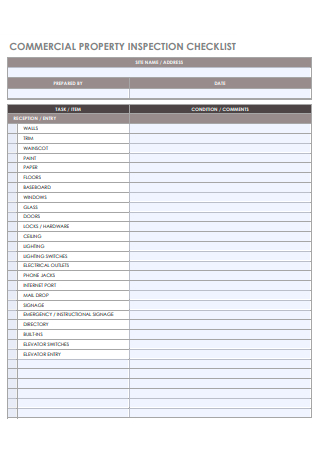
Commercial Property Inspection Checklist
download now -
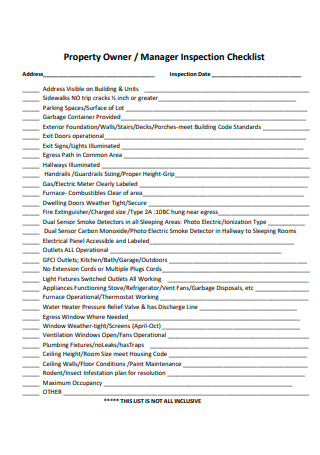
Property Owner Manager Inspection Checklist
download now -
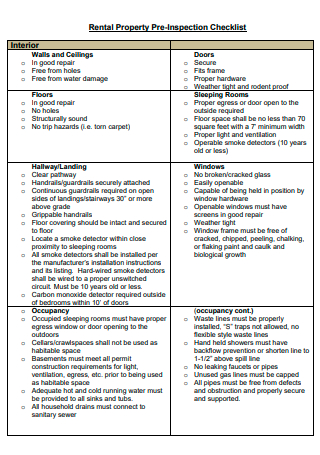
Rental Property Pre-Inspection Checklist
download now -
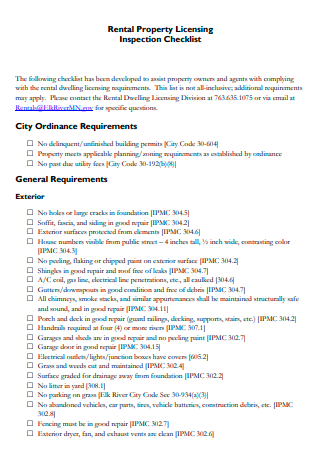
Rental Property Licensing Inspection Checklist
download now -
Property Maintenance Inspection Checklist Template
download now -
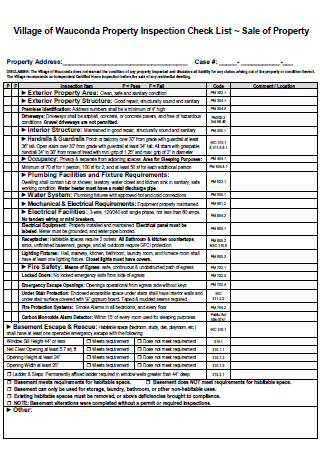
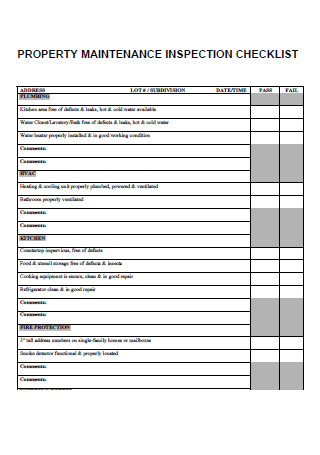
Sale of Property Inspection Checklist Template
download now -

International Property Maintenance Pre-Inspection Checklist
download now -
Property Inspection Checklist Format
download now -

Building Property Inspection Checklist
download now -
Simple Property Inspection Checklist
download now -
Basic Property Inspection Checklist
download now -
Formal Property Inspection Checklist
download now -
Property Inspection Checklist in PDF
download now -
Exterior Property Inspection Checklist
download now
FREE Property Inspection Checklist s to Download
17+ Sample Property Inspection Checklist
What Is a Property Inspection Checklist?
Who Uses a Property Inspection Checklist?
Using a Home Inspection Report
How to Make a Property Inspection Checklist
What Can Be Left Out of a Property Inspection?
Tips for First-Time Buyers on Property Inspection
FAQs
What occurs during a property inspection?
What happens following the examination of the property?
Why is it necessary to check rental properties?
What Is a Property Inspection Checklist?
A property Inspection Checklist is a tool that helps property purchasers examine the condition of a property before acquiring it. This walkthrough property inspection checklist covers the exterior, interior, fireplace, roof, yard, garage, and other areas. It also aids in determining whether or not the property’s features are in excellent working order or require maintenance. Property management will be necessary even if you are not the landlord because tenants will expect the property to be in the best shape before they decide to proceed with the paperwork and physically moving in.
Who Uses a Property Inspection Checklist?
This property inspection checklist may be used by property purchasers, landlords, and professional building inspectors to assess the state of a property before purchase or before and after renting. Professional property inspectors do a comprehensive examination and assessment of the state of the property before preparing a professional Report. This checklist highlights a property’s primary components, their current state, which areas require attention, and which components require upkeep after purchase or leasing. Using a property inspection checklist will help you get the most out of your report. On rare occasions, tenants may even make use of a property inspection checklist so that they are able to assess the property and would want to make sure the property is suitable for their needs.
Using a Home Inspection Report
If the inspector uncovers more significant concerns or a longer list of minor issues than you anticipated, you may want to rethink your choice to buy that house. If you have any concerns, speak with the inspector. In most cases, inspectors will not estimate repair costs or the remaining useful life of appliances or other systems on your behalf. You may need to acquire your own repair and replacement quotes from local professionals and home improvement retailers if you’re concerned about certain items. There are times, particularly in hot markets, when sellers will only take non-contingent bids, which means the buyer agrees to buy without inspecting the Property.
How to Make a Property Inspection Checklist
Before the inspector arrives, it is recommendable that you prepare for the home inspection by preparing a list of the areas of the house that you want to be checked. An inspection should take a couple of hours at the very least. Try to be as present as possible to learn as much as you can about the property’s condition, take your own notes and photos, and inquire about anything that bothers you. The following are the most fundamental elements that should be on your checklist. Creating an appropriate property condition checklist that will fit into the needs of your Rental Property will be most efficient rather than using a generic template. But the upside is in using a template is that you know the basic structure and won’t have to waste time starting from scratch.
Step 1: Check the Exterior
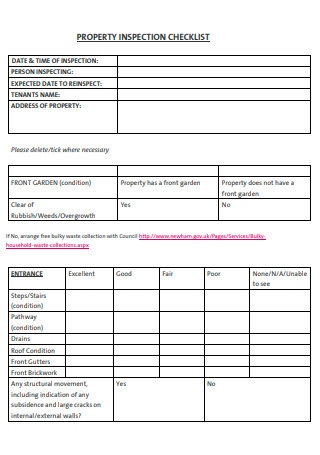
Examine the foundation of the property to see whether it may cause any issues in the future. You’d have to look at the outside. Whether it’s in the front yard or the rear, don’t leave any stone untouched. Review the porch and balconies if there are any, such as the quality or state of the material that was used to build it. Both walkways and driveways should be well-paved in a way that won’t affect the path that tenants will use when walking and driving their respective vehicles. Most of all, the state of the paint or quality of the exterior walls is important to evaluate. If it has become too dilapidated, then that won’t be safe and appropriate to gaze at.
Step 2: Check the Structure
Examine the home’s structural integrity carefully, since it will influence a number of other aspects in the future. You would need to check the state of the roof as well if there are holes or other leaks that can cause a problem to the tenants especially during rainy weather. Rain gutters and downspouts should also be in working condition and not be stuck with any unnecessary debris to block the flow of the water.
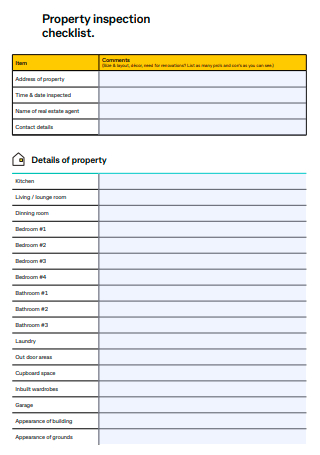
Step 3: Check the Interior
The next step will usher you inside the property. Take a walk around the house and evaluate everything you observe. This includes the state of the inner walls, the ceilings, and of course the floors. If there is any dirt or a dangerous substance, then it should be cleaned up before a tenant moves in. The doors and windows should be in good working condition with locks to secure the house. Lastly, if there are other floors, check the stairs, steps, and railings that they are safe and sturdy.
Step 4: Check Plumbing
Don’t forget to check at the property’s plumbing and HVAC unit, since they’re both big-ticket issues that need to be looked at closely. The majority of first-time homebuyers, as well as long-time homeowners, are unfamiliar with how plumbing and HVAC systems operate. Double-check the fixtures, faucets, and if applicable, the water heater.
Step 5: Check Electrical Plugs and Switches
While electrical systems are more difficult to inspect than just about everything else, it is beneficial to have a general understanding of how they work in the home. Check the electrical panel, light switches, and power outlets present in the Home as well as the thermostats and HVAC (heating, ventilation, and air conditioning) systems. Any attached appliances within the property should be duly checked as well.
Step 6: Examine Other Free Spaces
In some house situations, there are additional spaces available for the tenants. Attic space, basements, and the garage should be reviewed by the inspector and landowner as well to make sure no other harm may be encountered.
What Can Be Left Out of a Property Inspection?
Though the house inspection procedure is quite comprehensive, there are a few items that aren’t covered. Internet service, sprinkler systems, and gardening are just a few examples. The rationale for these restrictions is that inspectors are more concerned with the house itself than with anything that may be considered superfluous. Fortunately, they are generally objects that can be checked during a tour. Depending on the property or the inspector, a few more aspects of a property inspection may be ignored. Asking the inspector, moving carpet or snow, or even hiring a separate pest control specialist to examine the home might be the best method to verify these areas are up to your expectations before buying a house. While these additional obligations may appear burdensome throughout the home-buying process, they are yet another approach to safeguard the tenant and the landlord.
Tips for First-Time Buyers on Property Inspection
A first-time buyer inspection may appear intimidating at first, but it doesn’t have to be if you know how to prepare properly. The following are some pointers to keep in mind as you prepare for your first inspection, which will correspond to your property inspection Checklist. A home inspection checklist for buyers is crucial in order to assess the property they are eyeing. Be sure to check out available templates that you can base on your own inspection checklist.
FAQs
What occurs during a property inspection?
The examination takes around ten minutes on average. When the property manager inspects the property, he or she will take notes and maybe pictures of any issues that need to be addressed. Our Property managers are all very skilled and may identify concerns that you are unaware of. The benefit of having a professional inspect your home is that minor concerns may be addressed before they become significant problems. If you’re present, the property manager will also speak with you and answer any questions you may have, or pass them on to the landlord. Be sure to take note of your prepared rental inspection checklist as you go about the property inspection.
What happens following the examination of the property?
The property manager will compile their notes and prepare a report that includes any photographs they took. Both you and the landlord will receive copies. This ensures that concerns have been reported and that the landlord has the proper information to handle repairs in accordance with the landlord’s agreement with the tenant. A home Inspection is typically a good experience and an opportunity to fix concerns, so it’s nothing to be concerned about. Creating a property inspection checklist before settlement is important in order to do a thorough review of the property before deciding that it is ready for tenants to move in.
Why is it necessary to check rental properties?
A property inspection is essential for both the tenant and the landlord to adhere to the leasing agreement. If you are a renter, the inspection is primarily to allow you to ask questions of the estate agent or property manager and to voice any issues you may have. Minor maintenance concerns, such as getting rid of bathroom mildew or keeping windows clean, can be handled by most property managers. It’s also a good opportunity to highlight the property management of any problem areas, such as squeaky doors or sagging patio pavement. Property inspections are an excellent method to keep communication open if you’re able to attend. Knowing who manages the flat where you live is always reassuring.
Preparing an apartment inspection checklist whether you are the landowner, property buyer, or tenant will not be easy if you don’t know where to begin or how to start the format. No property inspection checklist is the same for all the properties because some lots will have special classifications that make them unique and sets them apart from the rest. Catering a unique checklist for your own property will be necessary to check for all the important factors. But what has been mentioned in the article above is more or less applicable to most properties. And now that you are well-equipped with the knowledge and understand its importance, you are more than ready to write out your own property inspection checklist!